上一次实现了一个简单的线程池,这一次我们来实现一些简单的拒绝策略
模拟任务数超过任务队列的情况
首先为了模拟这种情况,我们需要多增加一些任务,修改一下之前的代码添加一些命令输出方便观察
1
2
3
4
5
6
7
8
9
10
11
12
13
14
15
16
17
18
19
20
21
22
23
24
25
26
27
28
29
30
31
32
33
34
35
36
37
38
39
40
41
42
43
44
45
46
47
48
49
50
51
52
53
54
55
56
57
58
59
60
61
62
63
64
65
66
67
68
69
70
71
72
73
74
75
76
77
78
79
80
81
82
83
84
85
86
87
88
89
90
91
92
93
94
95
96
97
98
99
100
101
102
103
104
105
106
107
108
109
110
111
112
113
114
115
116
117
118
119
120
121
122
123
124
125
126
127
128
129
130
131
132
133
134
135
136
137
138
139
140
141
142
143
144
145
146
147
148
149
150
151
152
153
154
155
156
157
158
159
160
161
162
163
164
165
166
167
168
169
170
171
172
173
174
175
176
177
178
179
180
181
182
183
184
185
186
187
188
189
190
| @Slf4j(topic = "c.TestPool")
public class TestPool {
public static void main(String[] args) {
ThreadPool threadPool = new ThreadPool(2,1000,TimeUnit.MILLISECONDS,10);
for(int i = 0; i < 15;i++){
int j = i;
threadPool.execute(()-> {
try {
Thread.sleep(100000L);
} catch (InterruptedException e) {
e.printStackTrace();
}
log.debug("{}",j);
});
}
}
}
@Slf4j(topic = "c.ThreadPool")
class ThreadPool{
private BlockingQueue<Runnable> taskQueue;
private HashSet<Worker> workers = new HashSet<>();
private int coreSize;
private long timeout;
private TimeUnit timeUnit;
public void execute(Runnable task){
synchronized (workers){
if(workers.size() < coreSize){
log.debug("新增 worker{},{}",workers,task);
Worker worker = new Worker(task);
workers.add(worker);
worker.start();
}else {
taskQueue.put(task);
}
}
}
public ThreadPool(int coreSize, long timeout, TimeUnit timeUnit, int queueCapcity) {
this.coreSize = coreSize;
this.timeout = timeout;
this.timeUnit = timeUnit;
this.taskQueue = new BlockingQueue<>(queueCapcity);
}
class Worker extends Thread{
private Runnable task;
public Worker(Runnable task) {
this.task = task;
}
@Override
public void run() {
while (task != null || (task = taskQueue.poll(timeout,timeUnit)) != null){
try {
log.debug("正在执行...{}",task);
task.run();
}catch (Exception e){
e.printStackTrace();
} finally {
task = null;
}
}
synchronized (workers){
log.debug("worker 被移除{}",this);
workers.remove(this);
}
}
}
}
@Slf4j(topic = "c.BlockingQueue")
class BlockingQueue<T>{
private Deque<T> queue = new ArrayDeque<>();
private ReentrantLock lock = new ReentrantLock();
private Condition fullWaitSet = lock.newCondition();
private Condition emptyWaitSet = lock.newCondition();
private int capcity;
public BlockingQueue(int capcity) {
this.capcity = capcity;
}
public T poll(long timeout, TimeUnit unit){
lock.lock();
try {
long nanos = unit.toNanos(timeout);
while (queue.isEmpty()){
try {
if(nanos <= 0){
return null;
}
nanos = emptyWaitSet.awaitNanos(nanos);
} catch (InterruptedException e) {
e.printStackTrace();
}
}
T t = queue.removeFirst();
fullWaitSet.signal();
return t;
}finally {
lock.unlock();
}
}
public T take(){
lock.lock();
try {
while (queue.isEmpty()){
try {
emptyWaitSet.await();
} catch (InterruptedException e) {
e.printStackTrace();
}
}
T t = queue.removeFirst();
fullWaitSet.signal();
return t;
}finally {
lock.unlock();
}
}
public void put(T element){
lock.lock();
try {
while(queue.size() == capcity){
try {
log.debug("等待加入任务队列{}...",element);
fullWaitSet.await();
} catch (InterruptedException e) {
e.printStackTrace();
}
}
log.debug("加入任务队列{}",element);
queue.addLast(element);
emptyWaitSet.signal();
}finally {
lock.unlock();
}
}
public int size(){
lock.lock();
try {
return queue.size();
}finally {
lock.unlock();
}
}
}
|
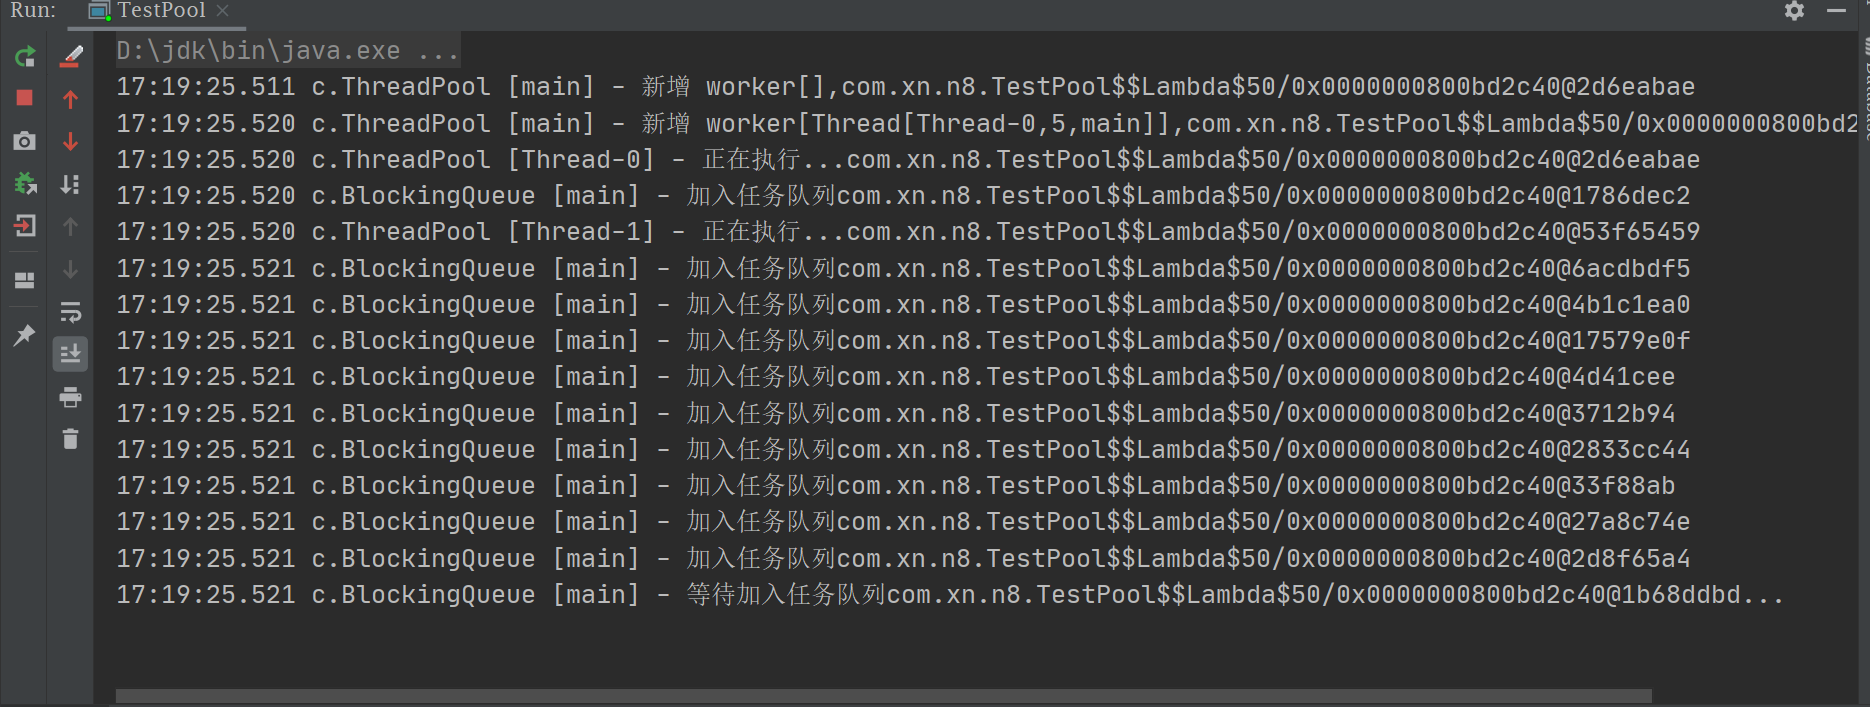
我们可以看出来任务已经满了,正在等待加入队列,目前我们的策略是让任务死等,这样非常不人性化,接下来我们实现一些不同的拒绝策略
拒绝策略的介绍
ThreadPoolExecutor是一个典型的缓存池化设计的产物,因为池子有大小,当池子体积不够承载时,就涉及到拒绝策略。JDK中已经预设了4种线程池拒绝策略,下面结合场景详细聊聊这些策略的使用场景,以及我们还能扩展哪些拒绝策略。
当前提交任务数大于(maxPoolSize + queueCapacity)时就会触发线程池的拒绝策略了。
实现拒绝策略
那么接下来实现几个策略,我们需要使用设计模式里的策略模式,我们先来实现一个接口
- 1.一直等待
- 2.带超时等待
- 3.让调用者放弃任务执行
- 4.让调用者抛出异常
- 5.让调用者自己执行任务
那么我们来改造代码,首先我们需要添加一个拒绝策略的参数在ThreadPool类里
1
2
|
private RejectPolicy<Runnable> rejectPolicy;
|
记得把构造方法里添加拒绝策略的参数
增加一个接口
1
2
3
4
| @FunctionalInterface
interface RejectPolicy<T>{
void reject(BlockingQueue<T> queue, T task);
}
|
将execute方法修改
1
2
3
4
5
6
7
8
9
10
11
12
13
14
15
16
17
18
19
20
| public void execute(Runnable task){
synchronized (workers){
if(workers.size() < coreSize){
log.debug("新增 worker{},{}",workers,task);
Worker worker = new Worker(task);
workers.add(worker);
worker.start();
}else {
taskQueue.tryPut(rejectPolicy,task);
}
}
}
|
接下来我们来实现taskQueue的tryPut方法
1
2
3
4
5
6
7
8
9
10
11
12
13
14
15
16
| public void tryPut(RejectPolicy<T> rejectPolicy, T task) {
lock.lock();
try {
if(queue.size() == capcity){
rejectPolicy.reject(this,task);
}else {
log.debug("加入任务队列{}",task);
queue.addLast(task);
emptyWaitSet.signal();
}
}finally {
lock.unlock();
}
}
|
实现让线程一直等待的策略
接下来我们就可以实现拒绝策略了,来试试第一种拒绝策略,让线程一直等待。编写测试类,把响应的参数调好就可以开始测试
1
2
3
4
5
6
7
8
9
10
11
12
13
14
15
16
17
18
19
20
21
22
23
24
25
26
27
28
29
30
31
32
33
34
35
36
37
38
39
40
41
42
43
44
45
46
47
48
49
50
51
52
53
54
55
56
57
58
59
60
61
62
63
64
65
66
67
68
69
70
71
72
73
74
75
76
77
78
79
80
81
82
83
84
85
86
87
88
89
90
91
92
93
94
95
96
97
98
99
100
101
102
103
104
105
106
107
108
109
110
111
112
113
114
115
116
117
118
119
120
121
122
123
124
125
126
127
128
129
130
131
132
133
134
135
136
137
138
139
140
141
142
143
144
145
146
147
148
149
150
151
152
153
154
155
156
157
158
159
160
161
162
163
164
165
166
167
168
169
170
171
172
173
174
175
176
177
178
179
180
181
182
183
184
185
186
187
188
189
190
191
192
193
194
195
196
197
198
199
200
201
202
203
204
205
206
207
208
209
210
211
212
213
214
215
216
217
218
219
220
221
222
223
224
225
226
227
228
229
230
231
232
233
234
| @Slf4j(topic = "c.TestPool")
public class TestPool {
public static void main(String[] args) {
ThreadPool threadPool = new ThreadPool(1,1000,TimeUnit.MILLISECONDS,1,((queue, task) -> {
queue.put(task);
}));
for(int i = 0; i < 3;i++){
int j = i;
threadPool.execute(()-> {
try {
Thread.sleep(100000L);
} catch (InterruptedException e) {
e.printStackTrace();
}
log.debug("{}",j);
});
}
}
}
@FunctionalInterface
interface RejectPolicy<T>{
void reject(BlockingQueue<T> queue, T task);
}
@Slf4j(topic = "c.ThreadPool")
class ThreadPool{
private BlockingQueue<Runnable> taskQueue;
private HashSet<Worker> workers = new HashSet<>();
private int coreSize;
private long timeout;
private TimeUnit timeUnit;
private RejectPolicy<Runnable> rejectPolicy;
public void execute(Runnable task){
synchronized (workers){
if(workers.size() < coreSize){
log.debug("新增 worker{},{}",workers,task);
Worker worker = new Worker(task);
workers.add(worker);
worker.start();
}else {
taskQueue.tryPut(rejectPolicy,task);
}
}
}
public ThreadPool(int coreSize, long timeout, TimeUnit timeUnit, int queueCapcity,RejectPolicy<Runnable> rejectPolicy) {
this.coreSize = coreSize;
this.timeout = timeout;
this.timeUnit = timeUnit;
this.taskQueue = new BlockingQueue<>(queueCapcity);
this.rejectPolicy = rejectPolicy;
}
class Worker extends Thread{
private Runnable task;
public Worker(Runnable task) {
this.task = task;
}
@Override
public void run() {
while (task != null || (task = taskQueue.poll(timeout,timeUnit)) != null){
try {
log.debug("正在执行...{}",task);
task.run();
}catch (Exception e){
e.printStackTrace();
} finally {
task = null;
}
}
synchronized (workers){
log.debug("worker 被移除{}",this);
workers.remove(this);
}
}
}
}
@Slf4j(topic = "c.BlockingQueue")
class BlockingQueue<T>{
private Deque<T> queue = new ArrayDeque<>();
private ReentrantLock lock = new ReentrantLock();
private Condition fullWaitSet = lock.newCondition();
private Condition emptyWaitSet = lock.newCondition();
private int capcity;
public BlockingQueue(int capcity) {
this.capcity = capcity;
}
public T poll(long timeout, TimeUnit unit){
lock.lock();
try {
long nanos = unit.toNanos(timeout);
while (queue.isEmpty()){
try {
if(nanos <= 0){
return null;
}
nanos = emptyWaitSet.awaitNanos(nanos);
} catch (InterruptedException e) {
e.printStackTrace();
}
}
T t = queue.removeFirst();
fullWaitSet.signal();
return t;
}finally {
lock.unlock();
}
}
public T take(){
lock.lock();
try {
while (queue.isEmpty()){
try {
emptyWaitSet.await();
} catch (InterruptedException e) {
e.printStackTrace();
}
}
T t = queue.removeFirst();
fullWaitSet.signal();
return t;
}finally {
lock.unlock();
}
}
public void put(T element){
lock.lock();
try {
while(queue.size() == capcity){
try {
log.debug("等待加入任务队列{}...",element);
fullWaitSet.await();
} catch (InterruptedException e) {
e.printStackTrace();
}
}
log.debug("加入任务队列{}",element);
queue.addLast(element);
emptyWaitSet.signal();
}finally {
lock.unlock();
}
}
public int size(){
lock.lock();
try {
return queue.size();
}finally {
lock.unlock();
}
}
public void tryPut(RejectPolicy<T> rejectPolicy, T task) {
lock.lock();
try {
if(queue.size() == capcity){
rejectPolicy.reject(this,task);
}else {
log.debug("加入任务队列{}",task);
queue.addLast(task);
emptyWaitSet.signal();
}
}finally {
lock.unlock();
}
}
}
|

实现让线程超时后移除的策略(带超时等待的策略)
接下来让我们实现其他的拒绝策略吧
添加一个offer方法在BlookQueue里
1
2
3
4
5
6
7
8
9
10
11
12
13
14
15
16
17
18
19
20
21
22
23
24
|
public boolean offer(T task, long timeout, TimeUnit timeUnit) {
lock.lock();
try {
long nanos = timeUnit.toNanos(timeout);
while (queue.size() == capcity) {
try {
if(nanos <= 0) {
return false;
}
log.debug("等待加入任务队列 {} ...", task);
nanos = fullWaitSet.awaitNanos(nanos);
} catch (InterruptedException e) {
e.printStackTrace();
}
}
log.debug("加入任务队列 {}", task);
queue.addLast(task);
emptyWaitSet.signal();
return true;
} finally {
lock.unlock();
}
}
|
我们将睡眠时间设置为一秒就可以开始我们的测试
1
2
3
4
5
6
7
8
9
10
11
12
13
14
15
16
17
18
19
20
21
22
23
24
25
| public static void main(String[] args) {
ThreadPool threadPool = new ThreadPool(1,1000,TimeUnit.MILLISECONDS,1,((queue, task) -> {
queue.offer(task,500,TimeUnit.MILLISECONDS);
}));
for(int i = 0; i < 3;i++){
int j = i;
threadPool.execute(()-> {
try {
Thread.sleep(1000L);
} catch (InterruptedException e) {
e.printStackTrace();
}
log.debug("{}",j);
});
}
}
|
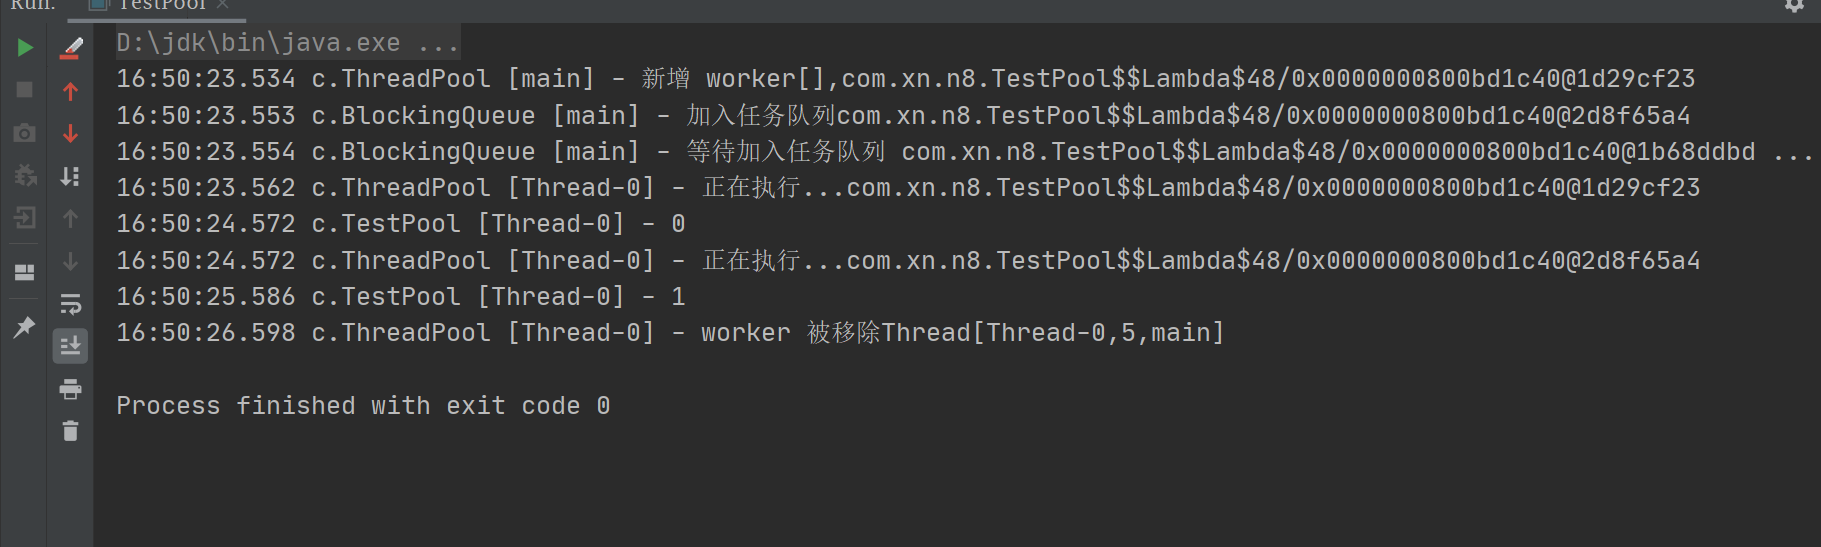
这下我们可以看出,线程并没有死等,一旦超过时间便会移除线程
线程放弃执行的策略
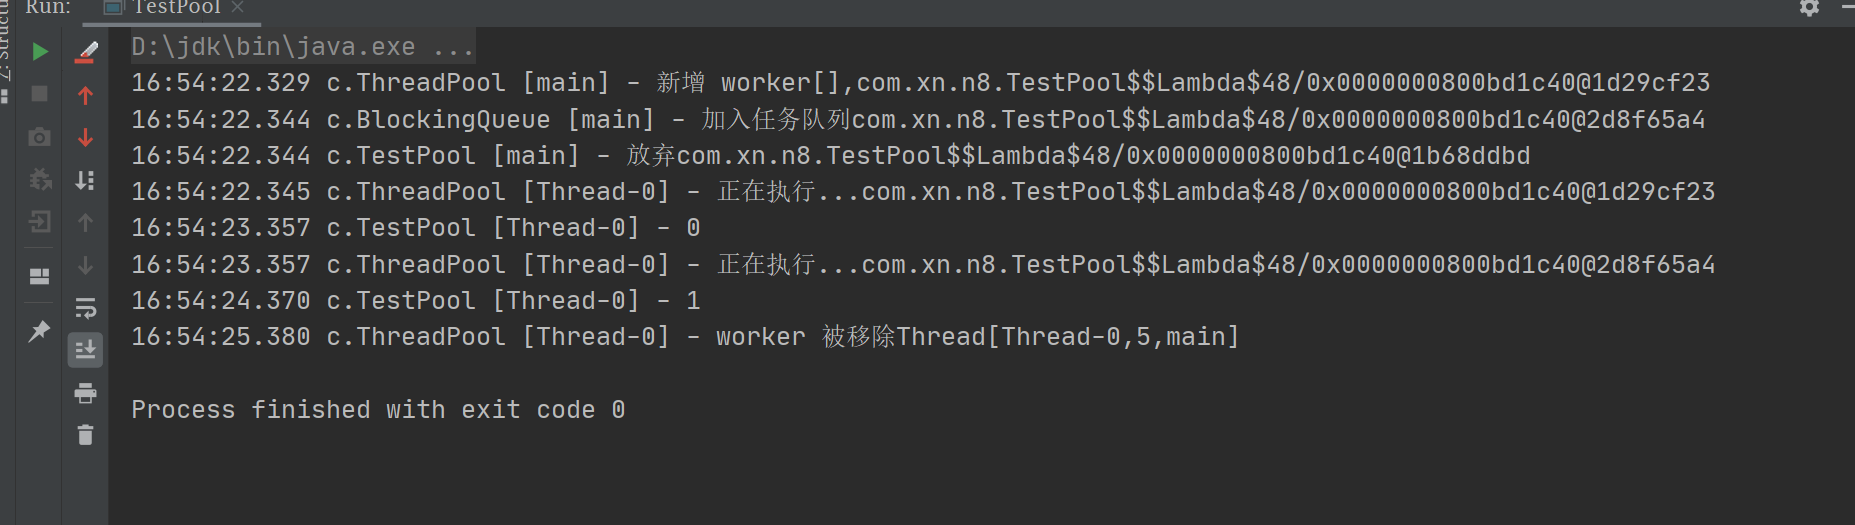
这种策略是最简单的,只要你什么都不做,线程就会自动放弃,我们可以打印一句话来观察一下结果
1
2
3
4
5
6
7
8
9
10
11
12
13
14
15
16
17
18
19
20
21
22
23
24
25
26
27
| public static void main(String[] args) {
ThreadPool threadPool = new ThreadPool(1,1000,TimeUnit.MILLISECONDS,1,((queue, task) -> {
log.debug("放弃{}",task);
}));
for(int i = 0; i < 3;i++){
int j = i;
threadPool.execute(()-> {
try {
Thread.sleep(1000L);
} catch (InterruptedException e) {
e.printStackTrace();
}
log.debug("{}",j);
});
}
}
|
让线程抛出异常的策略
我们只需要在执行时抛出一个异常就好了
1
2
3
4
5
6
7
8
9
10
11
12
13
14
15
16
17
18
19
20
21
22
23
24
25
26
27
28
29
| public static void main(String[] args) {
ThreadPool threadPool = new ThreadPool(1,1000,TimeUnit.MILLISECONDS,1,((queue, task) -> {
throw new RuntimeException("任务执行失败"+ task);
}));
for(int i = 0; i < 4;i++){
int j = i;
threadPool.execute(()-> {
try {
Thread.sleep(1000L);
} catch (InterruptedException e) {
e.printStackTrace();
}
log.debug("{}",j);
});
}
}
|

注意这种策略和第三种放弃的策略有一些不同,假如有4个线程,第三种放弃策略的情况下,第三个任务和第四个任务是会被放弃了,是会进入执行log.debug打印出来的
而第四种抛异常的策略,第三个任务和第四个任务是没有进入程序的,第四个任务是不会显示的因为抛出异常程序直接就中断了
第五种策略 让调用者自己执行任务
让调用者自己执行任务的策略也非常简单,只需要调用task.run()就可以了
1
2
3
4
5
6
7
8
9
10
11
12
13
14
15
16
17
18
19
20
21
22
23
24
25
26
27
28
29
30
| public static void main(String[] args) {
ThreadPool threadPool = new ThreadPool(1,1000,TimeUnit.MILLISECONDS,1,((queue, task) -> {
task.run();
}));
for(int i = 0; i < 4;i++){
int j = i;
threadPool.execute(()-> {
try {
Thread.sleep(1000L);
} catch (InterruptedException e) {
e.printStackTrace();
}
log.debug("{}",j);
});
}
}
|

可以看到2,3任务被main线程执行了,到现在为止我们已经实现了5种策略模式,还有其他的策略模式大家可以自己探索一下。下面我会将完整代码贴出来,感谢大家的观看,最近忙着秋招实在太忙了,等秋招后会保持一定的更新频率的
完整代码
1
2
3
4
5
6
7
8
9
10
11
12
13
14
15
16
17
18
19
20
21
22
23
24
25
26
27
28
29
30
31
32
33
34
35
36
37
38
39
40
41
42
43
44
45
46
47
48
49
50
51
52
53
54
55
56
57
58
59
60
61
62
63
64
65
66
67
68
69
70
71
72
73
74
75
76
77
78
79
80
81
82
83
84
85
86
87
88
89
90
91
92
93
94
95
96
97
98
99
100
101
102
103
104
105
106
107
108
109
110
111
112
113
114
115
116
117
118
119
120
121
122
123
124
125
126
127
128
129
130
131
132
133
134
135
136
137
138
139
140
141
142
143
144
145
146
147
148
149
150
151
152
153
154
155
156
157
158
159
160
161
162
163
164
165
166
167
168
169
170
171
172
173
174
175
176
177
178
179
180
181
182
183
184
185
186
187
188
189
190
191
192
193
194
195
196
197
198
199
200
201
202
203
204
205
206
207
208
209
210
211
212
213
214
215
216
217
218
219
220
221
222
223
224
225
226
227
228
229
230
231
232
233
234
235
236
237
238
239
240
241
242
243
244
245
246
247
248
249
250
251
252
253
254
255
256
257
258
259
260
261
262
263
264
265
266
267
| @Slf4j(topic = "c.TestPool")
public class TestPool {
public static void main(String[] args) {
ThreadPool threadPool = new ThreadPool(1,1000,TimeUnit.MILLISECONDS,1,((queue, task) -> {
task.run();
}));
for(int i = 0; i < 4;i++){
int j = i;
threadPool.execute(()-> {
try {
Thread.sleep(1000L);
} catch (InterruptedException e) {
e.printStackTrace();
}
log.debug("{}",j);
});
}
}
}
@FunctionalInterface
interface RejectPolicy<T>{
void reject(BlockingQueue<T> queue, T task);
}
@Slf4j(topic = "c.ThreadPool")
class ThreadPool{
private BlockingQueue<Runnable> taskQueue;
private HashSet<Worker> workers = new HashSet<>();
private int coreSize;
private long timeout;
private TimeUnit timeUnit;
private RejectPolicy<Runnable> rejectPolicy;
public void execute(Runnable task){
synchronized (workers){
if(workers.size() < coreSize){
log.debug("新增 worker{},{}",workers,task);
Worker worker = new Worker(task);
workers.add(worker);
worker.start();
}else {
taskQueue.tryPut(rejectPolicy,task);
}
}
}
public ThreadPool(int coreSize, long timeout, TimeUnit timeUnit, int queueCapcity,RejectPolicy<Runnable> rejectPolicy) {
this.coreSize = coreSize;
this.timeout = timeout;
this.timeUnit = timeUnit;
this.taskQueue = new BlockingQueue<>(queueCapcity);
this.rejectPolicy = rejectPolicy;
}
class Worker extends Thread{
private Runnable task;
public Worker(Runnable task) {
this.task = task;
}
@Override
public void run() {
while (task != null || (task = taskQueue.poll(timeout,timeUnit)) != null){
try {
log.debug("正在执行...{}",task);
task.run();
}catch (Exception e){
e.printStackTrace();
} finally {
task = null;
}
}
synchronized (workers){
log.debug("worker 被移除{}",this);
workers.remove(this);
}
}
}
}
@Slf4j(topic = "c.BlockingQueue")
class BlockingQueue<T>{
private Deque<T> queue = new ArrayDeque<>();
private ReentrantLock lock = new ReentrantLock();
private Condition fullWaitSet = lock.newCondition();
private Condition emptyWaitSet = lock.newCondition();
private int capcity;
public BlockingQueue(int capcity) {
this.capcity = capcity;
}
public T poll(long timeout, TimeUnit unit){
lock.lock();
try {
long nanos = unit.toNanos(timeout);
while (queue.isEmpty()){
try {
if(nanos <= 0){
return null;
}
nanos = emptyWaitSet.awaitNanos(nanos);
} catch (InterruptedException e) {
e.printStackTrace();
}
}
T t = queue.removeFirst();
fullWaitSet.signal();
return t;
}finally {
lock.unlock();
}
}
public T take(){
lock.lock();
try {
while (queue.isEmpty()){
try {
emptyWaitSet.await();
} catch (InterruptedException e) {
e.printStackTrace();
}
}
T t = queue.removeFirst();
fullWaitSet.signal();
return t;
}finally {
lock.unlock();
}
}
public void put(T element){
lock.lock();
try {
while(queue.size() == capcity){
try {
log.debug("等待加入任务队列{}...",element);
fullWaitSet.await();
} catch (InterruptedException e) {
e.printStackTrace();
}
}
log.debug("加入任务队列{}",element);
queue.addLast(element);
emptyWaitSet.signal();
}finally {
lock.unlock();
}
}
public boolean offer(T task, long timeout, TimeUnit timeUnit) {
lock.lock();
try {
long nanos = timeUnit.toNanos(timeout);
while (queue.size() == capcity) {
try {
if(nanos <= 0) {
return false;
}
log.debug("等待加入任务队列 {} ...", task);
nanos = fullWaitSet.awaitNanos(nanos);
} catch (InterruptedException e) {
e.printStackTrace();
}
}
log.debug("加入任务队列 {}", task);
queue.addLast(task);
emptyWaitSet.signal();
return true;
} finally {
lock.unlock();
}
}
public int size(){
lock.lock();
try {
return queue.size();
}finally {
lock.unlock();
}
}
public void tryPut(RejectPolicy<T> rejectPolicy, T task) {
lock.lock();
try {
if(queue.size() == capcity){
rejectPolicy.reject(this,task);
}else {
log.debug("加入任务队列{}",task);
queue.addLast(task);
emptyWaitSet.signal();
}
}finally {
lock.unlock();
}
}
}
|
感谢观看